Surround Sound Receiver
We are using an Anthem MRX 1140 Receiver to power the home theater setup. This provides 140 watts per channel continuous power along with sub outs for the JL Audio subwoofers. If you are into theaters or audio, you know that Anthems receivers have been sold out and backlogged since they launched over a year ago. Audio Advice is the largest seller of Anthem for two main reasons. First, they simply sound amazing with great design, power supplies, and DACs. And second is their Anthem Room Correction software called ARC Genesis. We really can’t overstate how impressive this software is. Historically, good calibration systems were extremely expensive and very complex. Anthem has done a superb job making this software very user-friendly. So, if you are a do it yourselfer, you can easily learn it and calibrate your own system. Many of our DIY customers figure it out without ever calling us and those who want to go to the next level usually give us a call and we show them how to throw it into pro mode and tweak it to another level.
Calibration Tips & Tricks
When you set up your receiver, you want to first set all your distances. Now if you really want to do this right and have subwoofers with digital processing, then you want to increase the distance in your receiver to account for the delay in the subwoofer processor. In this case, the JL Audio processing adds 12 milliseconds of delay which converts to adding 12 feet to the distance. When you tell the processor that the subs are 12 feet farther away than they are, the processor then delays all of the other speakers by an extra 12 milliseconds so that the sub sound hits the main listening position at the same time as the other speakers. If you don’t know the delay in your subwoofer, check out our subwoofer calibration video where we show you exactly how to find the delay and phase align your subs.
Now that we have the distances right, we want to run room optimization on the subwoofers if they have it. In this case, the JL Audio subs have a great calibration system that is relatively automated. You essentially put the mic in the main listening position and hit one button to calibrate the subs. By doing these first, we free up processing power in the Anthem for the room correction. If you are setting up your own system or want to go back and get the most out of your own, be sure to watch our video on how to best set up a receiver that walks through the details of these steps. Once the subs are set, we run ARC Genesis on the Anthem. To do this, you start with your microphone in the main listening position facing upward with the small white dot facing forward. It is key to make sure you’ve turned off all extra noises when you run ARC Genesis, including your HVAC system and anything else creating excess noise. ARC Genesis will have you run test tones with the microphone in multiple positions. Remember that the first position is the most important as it will set the levels of the speakers. Once you are done, ARC will show you the before and after curves. Once that is done, be sure to quickly run through the Audio Advice audio and video calibration tones and patterns. These adjust the center channel speaker, get all of the video settings, correct, etc.
Best Free Home Theater Audio & Video Upgrades w/ Test Tones & Patterns
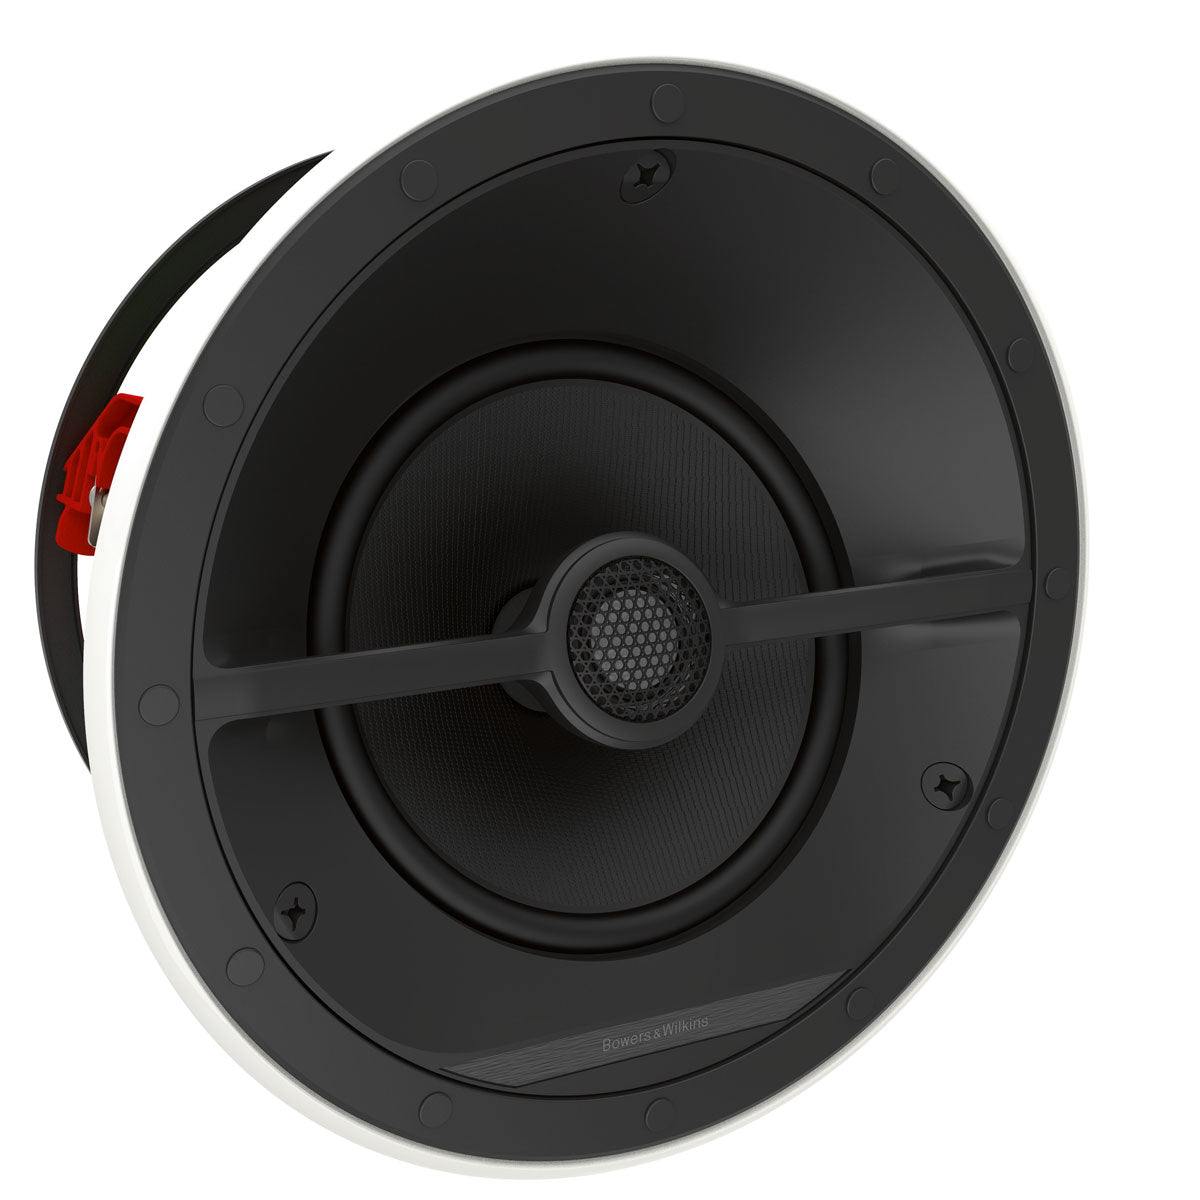
Once we are done with those calibrations, we listen to some movie clips we know really well for the home theater setup. Oftentimes, we want a more powerful impact from a gunshot or explosion. For this, we go into ARC pro mode and bring up the room gain slightly. Most rooms sound really good with around 3-4db room gain. We then add a slight amount of deep bass boost. In this room, we added just 1 db of deep bass boost. If the room has an acoustically transparent screen and B&W speakers as this one does, we also will increase the maximum correction frequency all of the way up to 20khz vs. the default 5khz because the screen is slightly impacting the sound and has a greater effect at higher frequencies. This is also true of the acoustically transparent fabric covering the sides and rears. By recalculating the curves all of the way up to 20khz, you immediately get better imaging and highs. Anthem will be releasing an improved version of Arc Genesis that we have been beta testing that includes phase alignment. When they do, we will release a full video going through best practices on how to get the most of it.
Acoustic Treatment
Another important feature in this room is the utilization of good acoustic treatment principles. In this case, you don’t see the sides because we have them covered with acoustic panels. We used full-length acoustic panels wrapped with acoustically transparent cloth and then we cut out the absorptive material where the speakers are. We use this technique when customers want a clean look with the speakers fully hidden. The panels serve as both aesthetic and acoustic elements in the room.
A/V Rack
When you only have a small location to place a rack, you have to come up with some innovative solutions. In this case, our team had to work with a small cabinet located inside the room on the side wall. Since this is such a tight space, our team designed a small rack with all the components needed and placed the rack on a rail system that slides out of the cabinet very easily. Underneath the rack is a small button that you can press and easily spin the rack around to access the cables and inputs without crawling inside the cabinet. This will allow the customer to make future upgrades and our techs to service the system with ease. Checkout our video to learn about best practices when designing an AV rack.