Sony AZ Series Home Theater Receiver Set Up Tips

Congratulations on your new Sony home theater AV receiver!
You likely have some questions about your new purchase. That’s why we’ve created this setup tips and tricks guide to help you get the best out of your Sony AZ Series AV receiver.
We’ll walk you through the available settings and give you suggestions on how to approach speaker setup and calibration.
Just a note: If we do not mention the setting, the default factory settings are fine.
First, connect your receiver to your television so you can navigate the menu system for setup.
Then, connect all your sources to the HDMI connections on the rear of the receiver and make a note of which input number they connect up to. It will save you some time later if you go ahead and connect up your sources to match the names as well as you can, but you can remap and rename them in the menu.
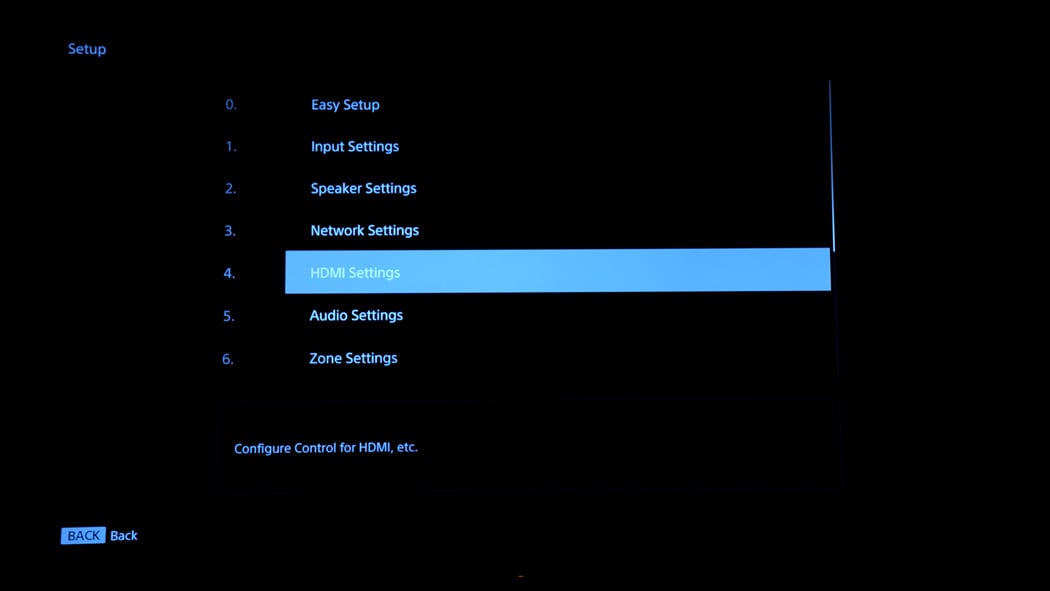
Then, push the home button. You should see the main menu. Navigate down to settings and select it. If you want to use any of the network features, go to the network settings and set this up.
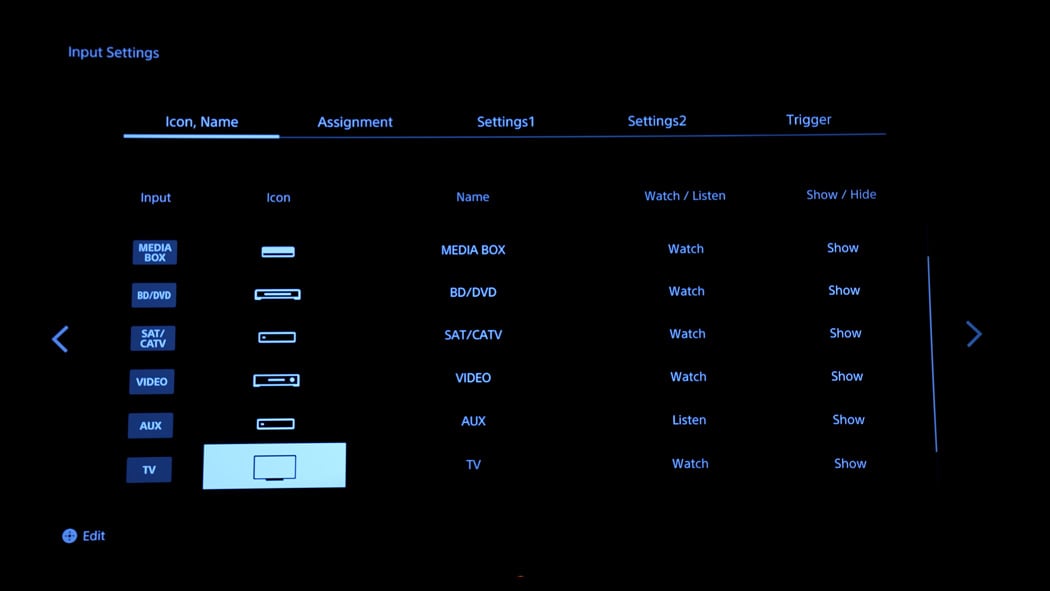
Then go back to one-input settings. You will be greeted with a grid to fully customize your inputs.
You can rename the inputs to whatever works best for you.

1: Under Settings 1, you will see a column labeled, “Preset Soundfield.” All of your inputs will come defaulted to LAST USED. You will want to update this to either Dolby or DTS:X mode depending on your speaker preference and layout. Remember, you need to do this for each of your active inputs.

2: Under Settings 1, you will see the column labeled, “In-Ceiling Speaker Mode.” This defaults to OFF. But, if your front or front and center speakers are mounted in the ceiling, you should change this to match your layout.
3: Under Settings 1, you will see the column labeled, “AV Sync.” This is to adjust for lip sync issues caused by your source when the sound is ahead of the video. This comes defaulted to off, however, most recent AV gear will correct this automatically through the HDMI connection.

We suggest you go ahead and set this to “HDMI Auto” to engage that feature.
Note: For some cable boxes and satellite receivers, this feature does not work well on any receiver we have seen. You may have to come back later and adjust this manually using the delay settings you see.
Watch Our Video On How to Adjust Lip Sync >
4: Under Settings 2, you will see a column labeled, “Preset Gain.” This is very handy if one of your sources is quieter than the others. For now, we recommend leaving it as is, but keep this in mind if you start switching sources and one is not as loud as the others.
The other settings are fine at their defaults.
Now use the back button and return to the main menu.
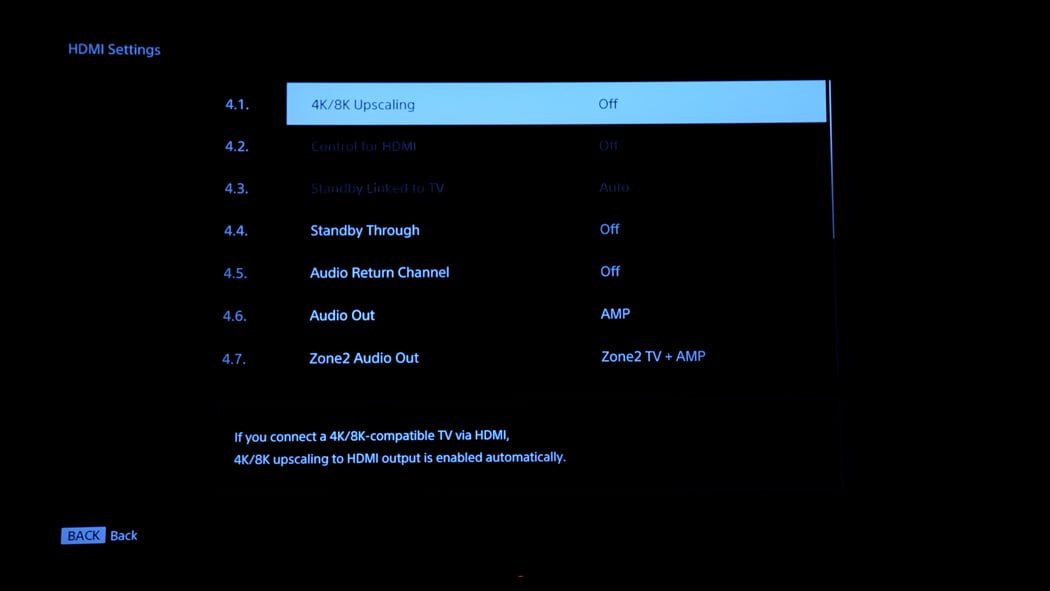
Choose 4 for the HDMI menu.

Under 4.1, you will see an option to turn on 4K/8K upscaling. If your TV or projector is of decent quality, do not be tempted to turn this on - leave it in the off position. The TV is usually the better place for upscaling to happen and this will happen automatically.

Under 4.5, you will see the Audio Return Channel. If you are using the apps in your TV, you will want to set this to ON so you get the full immersive surround sound back from your TV. This is critical if your TV is newer and has eARC, which allows for an uncompressed audio signal in full surround to pass back down, but you have to turn it ON for it to work.
Your new Sony AV receiver has several connection options and multiple settings in the menu.
This is the order that will give you the best results:
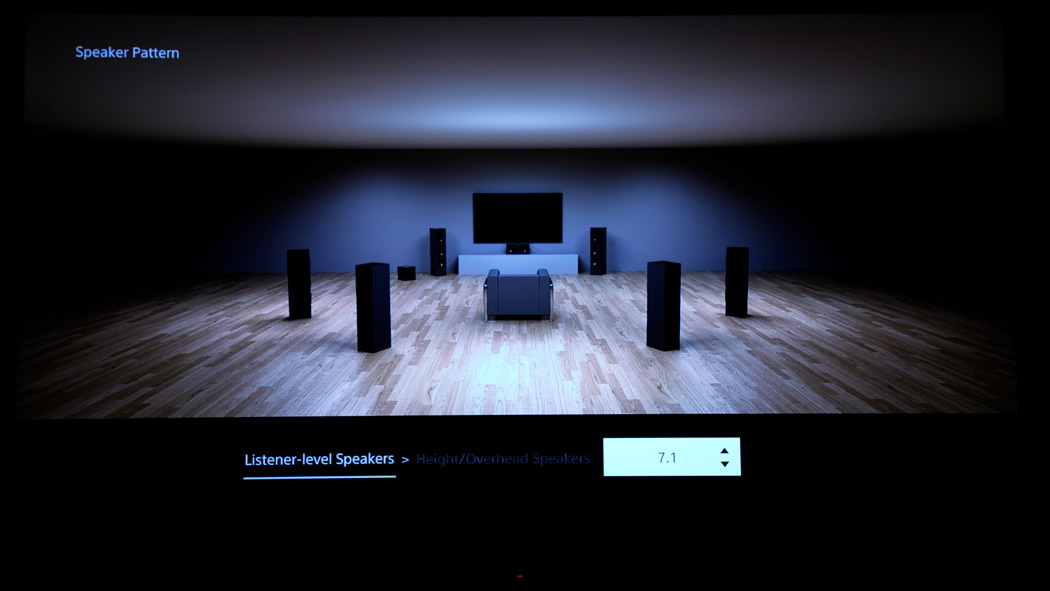
First Navigate to #2, speaker settings, then #4 Manual Speaker Settings, then #2.4.12 Speaker Pattern. You will have a wide selection of choices here. The key is to make sure the visual layout you see on screen matches the physical position of your speaker layout.

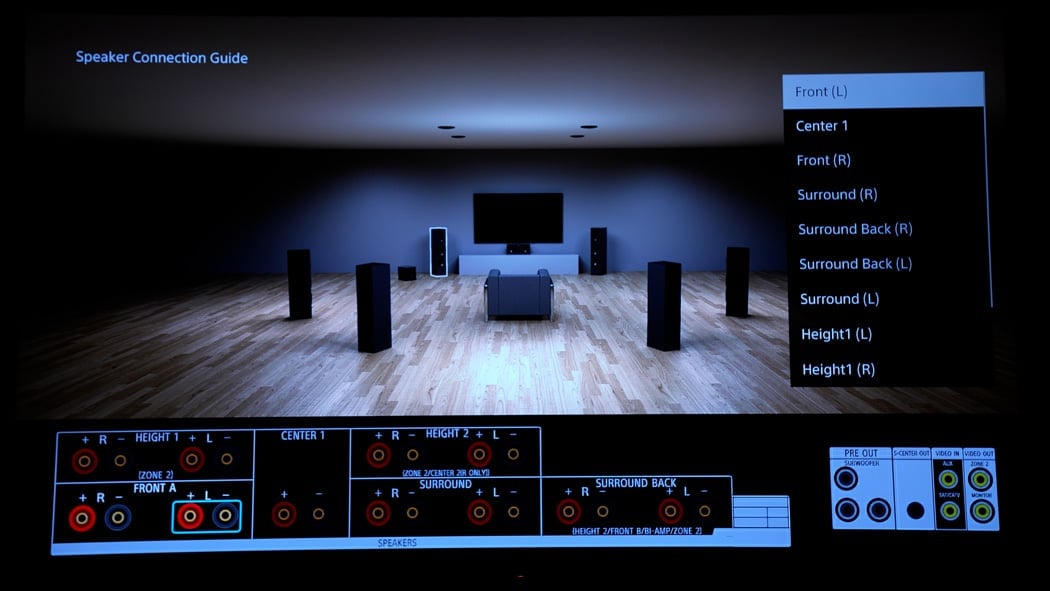
You can now connect your speakers. You should power the receiver OFF to make the connections. If you have any questions about which speaker wires go where section 2.4.13 will give you a visual of the placement. We suggest taking some quick pics of what you see on your TV with your phone as a quick reference.

Next, take a look at the spec sheets or manual for your main left and right speakers. You are looking for impedance, which is usually stated as 8 ohms, 6 ohms, or 4 ohms. If your speakers are 4 ohm, please go to section 2.4.14 and select 4 ohms. Otherwise, there is nothing to do.
Now that we are connected, it's time for the fun part-calibration! Calibration will make all the difference in how your home theater setup will sound.
First, let the receiver do all of its measurements. Then, go back and do a quick check to confirm they are where they should be. A laser tape measure will be extra handy here, as will a sound pressure level app for your smartphone. Decibel X is a great free one.
For this next step, you want your room quiet and you want to not block the microphone, so once you start, you can move off to the side and away from any speaker.
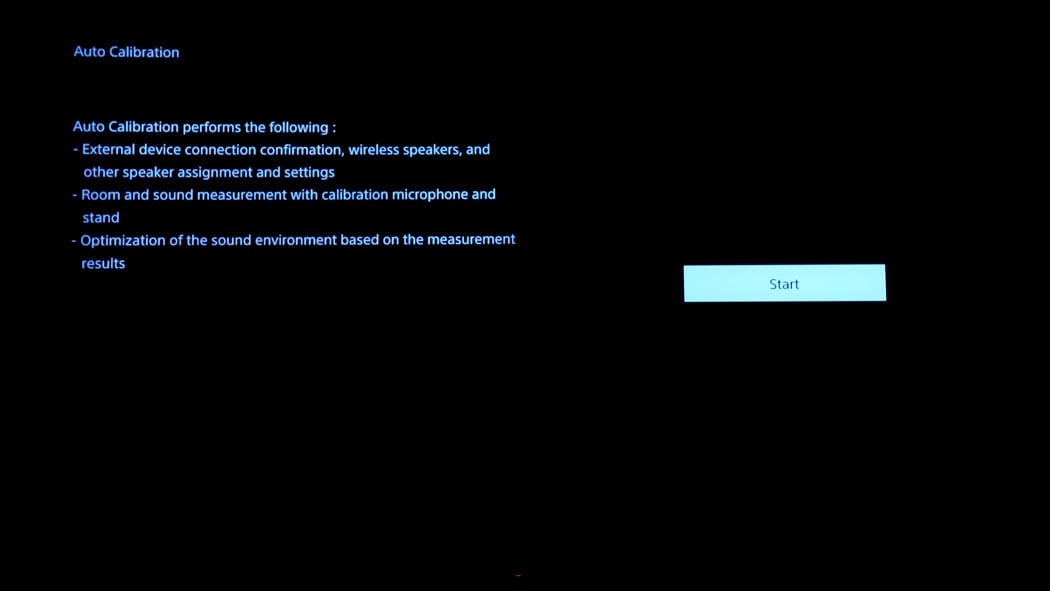
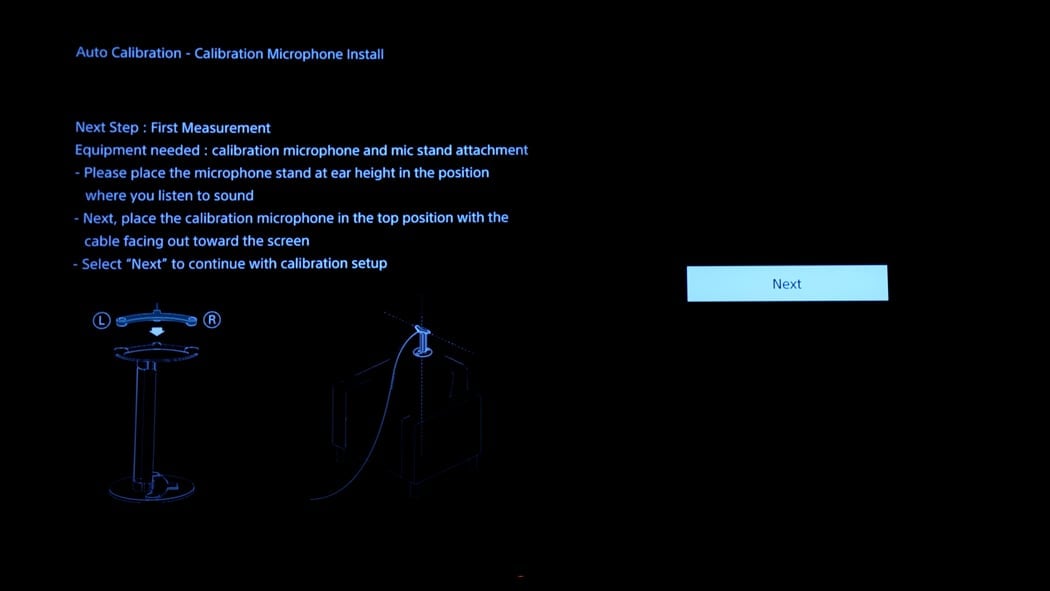
Navigate to 2.3, “Auto-Calibrate.”

Pro-Tip: Where you place the microphone will have a significant impact on how well Sony’s advanced room correction system does its job.
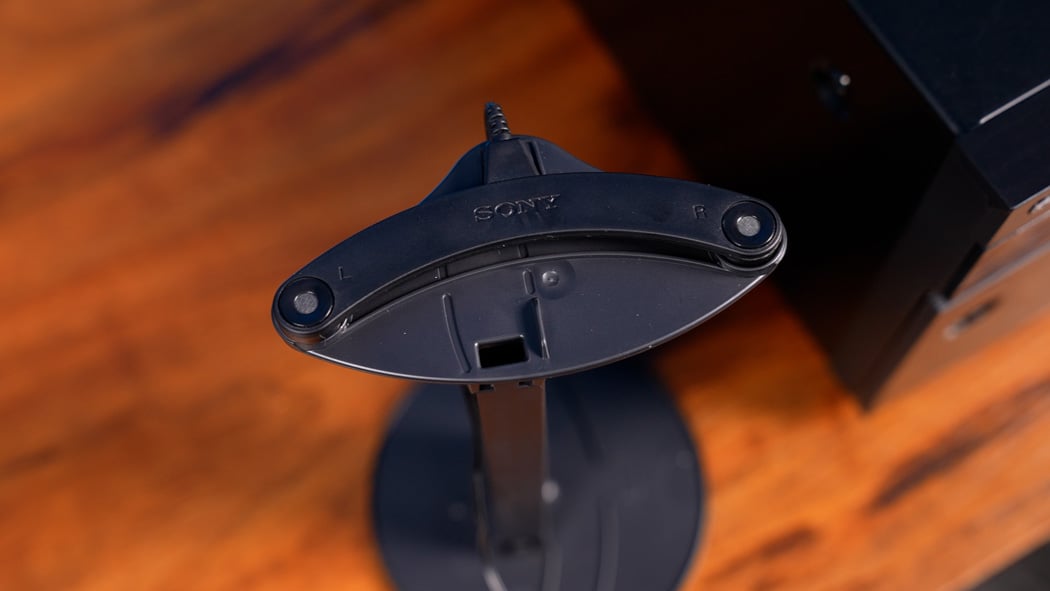
The microphone stand is clearly marked as to how to place the microphone. It also has a threaded insert for a tripod stand. You can do a quick google search and find a relatively inexpensive tripod mic stand.

Next, sit in your listening seat and have someone else take a measurement to see how far off the floor your ears are. For most people and chairs, this will be 41”, but it’s best to double-check. You then want to place the microphone as close as possible to this height measured from the top of the microphone.

You also want the mic to be parallel to your main speakers and as centered in your primary listening chair as possible. If your chair has a low back and the microphone is above the back of the chair, we advise you to put a thick blanket over the back of your chair or couch covering both the back and seat. If your chair has a taller back and can recline, we recommend you tilt it all the way back so the microphone is not close to the back of your chair.
If your chair or couch does not recline, raise the level of the microphone until it clears the back of the seat and cover the chair or couch with a heavy blanket.
Once you have the microphone in the right place, you can start the calibration. You will have to make two passes by rotating the microphone and giving the receiver some distance data.
Once this is done, we suggest you choose Sony Engineer for room correction.
Now, let’s check if all the settings are correct.
Navigate to 2.4.7 and check the sizes of your speakers. Only large tower speakers should show up as large. But, for 90% of home theaters, you want to set these to small to allow your subwoofer to handle the deep bass. The Sony AV receiver features two different presets for everything we are adjusting.
Navigate to 2.4.8 and check the crossover frequency for each speaker. Typically we suggest 80Hz as a great starting point. However, if your center channel is inside a cabinet or in a tight space, playing around with its crossover can make a big improvement in the dialog.
Watch Our Video On How to Adjust Your Center Channel Crossover>
Please check these using a tape measure under 2.4.4, 2.4.5, and 2.4.6.
Navigate to 2.4.1. Sit in your listening chair, open up the sound pressure app on your smartphone, or use an actual meter. Point it straight up. Go to each speaker and confirm the levels are the same. Some people prefer to boost their center channel by 2-3 dB which is a matter of personal preference.
This concludes our tips and tricks guide. Congratulations on successfully setting up your new Sony AV receiver!
Now, sit back and enjoy your favorite movies and music.
If you have any other technical questions, please feel free to reach out to our team at Audio Advice where our passionate home theater experts will be there to help you out.
You'll be among the first to know about product launches, exclusive online deals, and the hottest audio trends.
