How to Set Up a Sony TV for the Best Home Theater or Media Room Experience

youtube cover image
Play

If you’re building a home theater or media room and using a Sony TV as your centerpiece, you’ve made a great choice. Sony’s latest OLED and LED TVs are some of the best in the world when it comes to delivering stunning 4K HDR video, Dolby Vision, and gaming features like 120Hz and VRR. But just like any high-performance gear, you’ll want to spend a little time getting everything dialed in to really unlock your TV’s potential.

In this guide, we’ll walk you through everything from software updates to picture and audio settings, to ensure you’re getting the best possible experience from your Sony TV. Whether you’re setting up a Sony TV in a dedicated theater room or using it as the centerpiece of a media space with a full surround sound system, these tips will help you unlock its full potential.


Step 1

Update Your TV’s Software

Before you adjust any settings, it’s important to check for a software update. Just go to Settings, then System, and select Software Update. Sony regularly pushes updates that improve picture processing, add new features like VRR support, or fix minor bugs. Having the latest firmware ensures you get the best performance and compatibility, especially for things like Dolby Vision, eARC, and frame rate matching.

It only takes a minute, and it’s the best first step you can take.

Software update screengrab

Step 2

Choose the Best Picture Mode

When you first power on your Sony TV, it typically defaults to a vivid, overly bright showroom mode. For home theater use, you’ll want something more accurate. Head into Settings, then Display & Sound, and select Picture. From there, change your Picture Mode to either Cinema or Custom.

Cinema mode is designed for accurate out-of-the-box color and contrast without needing much adjustment. If you want to tweak your settings even further down the road, Custom mode gives you more flexibility.

While you’re in the picture settings, it’s also a good idea to change the Color Temperature to Warm or Expert 1. Although it may initially look a little warmer than you’re used to, it’s actually much closer to how content is meant to look. Cool color temperatures are a leftover from retail showroom settings and don’t serve you well in a calibrated home theater environment.

If you notice your TV automatically switching picture modes when you change content, that’s Sony’s Auto Picture Mode. If you’re building a serious home theater or media room, we recommend turning Auto Picture Mode off. It’s better to lock in a consistent, calibrated picture mode like Cinema or Custom, so your settings stay accurate no matter what you’re watching.

Step 3

Optimize Brightness, Contrast, and Local Dimming

Now let’s fine-tune the essentials.

Start by adjusting your Brightness or Backlight settings based on your room’s lighting. On Sony OLED models like the A95L, adjust the Brightness setting (which controls overall luminance) to around 35–40 for bright rooms, or lower it to 20–25 for darker rooms and nighttime movie watching to help preserve deep blacks and reduce eye strain. On Sony LED models like the Bravia 9, adjust the Backlight to around 90–100 for very bright rooms. For home theater-style dark rooms, 40–60 is often a better sweet spot. Some users find 15–25 too dim and it may crush shadow detail in HDR.

For HDR content, Peak Luminance should typically be set to High to get full highlight brightness. However, if you prefer a more natural film look or notice blooming on LED models, try Medium — especially in dark rooms. This ensures you get the full impact of HDR highlights without having to manually raise Brightness or Backlight for each movie.

Contrast should be left near its maximum setting, usually around 90 to 100, to give you the widest dynamic range. Color settings are typically accurate at their default midpoint around 50, and Hue or Tint should stay centered at zero unless you’re correcting for a specific issue.

If you’re using a Sony LED model like the Bravia 9, you’ll also want to adjust the Local Dimming setting. Set Local Dimming to Medium or High depending on preference. Medium often delivers better balance in dark scenes by reducing blooming and preserving shadow detail. High increases dynamic punch but can look artificial in some scenes.

As for Advanced Contrast Enhancer, we recommend turning it Off for most home theater setups. While it might make bright rooms feel punchier, it tends to artificially shift brightness levels during scenes, which can interfere with the natural look and intended tone mapping of movies and shows. For the most consistent and accurate performance, especially in a dark room, leaving it off gives you the cleanest results.


Step 4

Set Up HDR and Dolby Vision Properly

Sony TVs automatically detect HDR and Dolby Vision signals, but a few key settings make sure you’re getting the full impact.

First, go to Settings, then External Inputs, and select HDMI Signal Format. Change your HDMI port from Standard to Enhanced Format. This allows your TV to pass full 4K HDR signals, including Dolby Vision and 120Hz gaming, where supported. Some newer Sony TVs will even give you an "Enhanced (VRR)" option for gaming consoles like the PlayStation 5 and Xbox Series X.

When your TV receives a Dolby Vision signal, it should automatically switch into Dolby Vision Dark or Dolby Vision Bright mode. For home theaters and media rooms, Dolby Vision Dark is typically the best choice, as it's calibrated for darker viewing environments.

If your TV isn’t detecting Dolby Vision, double-check that your HDMI input is set to Enhanced and that your streaming device, Blu-ray player, or Apple TV is properly outputting Dolby Vision.

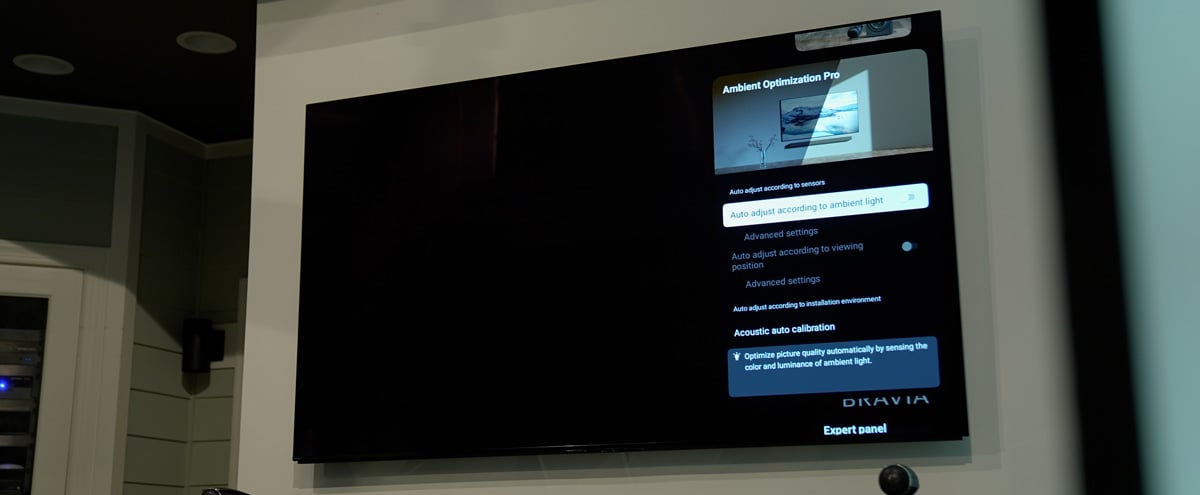
Leave Color Space set to Auto so your TV can automatically switch into the BT.2020 color space when HDR content is detected.

If you're using a streaming device like an Apple TV 4K, make sure to go into Settings > Video and Audio > Match Content and turn on both Match Dynamic Range and Match Frame Rate. This ensures your Sony TV only switches into HDR when the content actually calls for it, preserving accuracy and preventing unnecessary brightness boosts.


Step 5

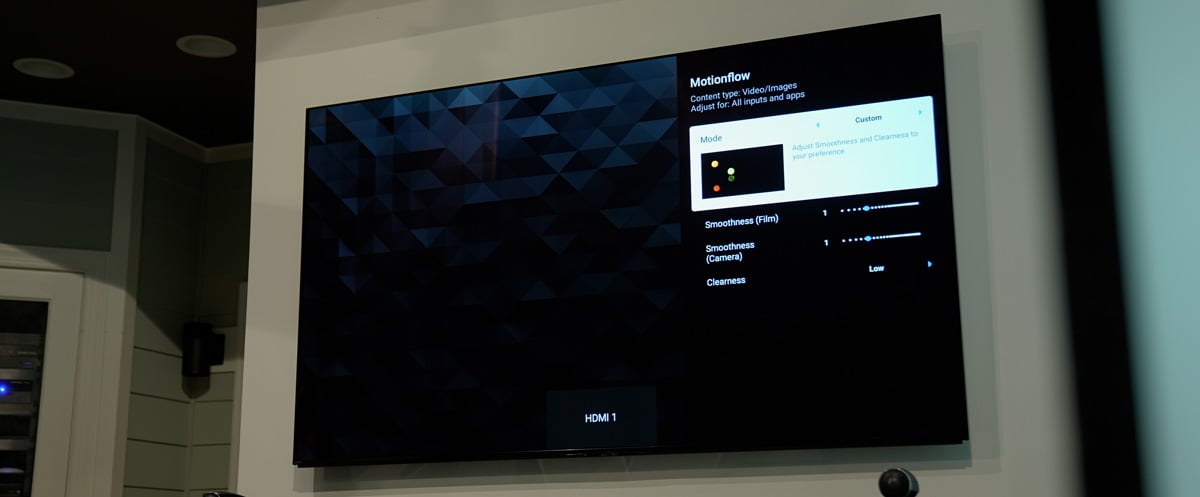
Adjust Motion Settings for a More Cinematic Look

Sony’s motion processing is some of the best in the business, but you’ll still want to tweak it to avoid the dreaded soap opera effect that makes movies look unnatural.

In your Motion Settings, set MotionFlow to Off or Custom. If you choose Custom, reduce Smoothness to zero and leave Clearness on Low. This preserves the natural motion cadence of movies and TV shows.

For CineMotion, also known as Film Mode, set it to High (Auto). This setting ensures that 24fps movies play back properly without judder, helping to preserve that authentic cinematic feel.

If you prefer a little smoothing for sports or fast-paced video games, you can create a secondary Custom MotionFlow preset with a small bump in Smoothness, but for movies and TV shows, it’s best left off.

Step 6

Configure Your Audio Settings for Home Theater

If you’re using a soundbar or an AV receiver with the apps on the Sony TV, setting up your Sony TV’s audio output correctly will ensure you get full Dolby Atmos and high-bitrate surround sound.

Go to Settings, then Display & Sound, and select Audio Output. If your sound system supports eARC, set eARC Mode to Auto. Next, set Digital Audio Out to Auto, or Passthrough if your TV offers it. This ensures that Dolby Atmos or DTS:X signals pass through unaltered to your receiver or soundbar.

If you’re using your TV’s built-in speakers, especially if you have a Sony OLED model with Acoustic Surface Audio+, it’s worth changing your Sound Mode to Cinema when watching movies. This helps open up the soundstage and improve dialogue clarity.

If you notice any lip sync issues, use the AV Sync setting under Audio Output or check your AVR’s lip sync adjustment to bring audio and video back into perfect alignment.

Step 7

Set Up Your HDMI Inputs Correctly

Every device you plug into your Sony TV needs to have its HDMI input optimized.

For each device, whether it's an Apple TV, Roku, gaming console, or Blu-ray player, make sure the HDMI port is set to Enhanced Format. This unlocks the full capabilities of 4K HDR and ensures you’re getting the best quality possible.

If you're gaming, make sure features like ALLM (Auto Low Latency Mode) and VRR (Variable Refresh Rate) are turned on for your gaming HDMI port, usually HDMI 3 or HDMI 4 on most Sony TVs. Also, make sure you’re using certified Ultra High Speed HDMI cables if you plan to use 4K 120Hz, Dolby Vision, or Dolby Atmos content.

When using devices like a 4K Blu-ray player or Apple TV, make sure your HDMI cable supports Ultra High Speed (48Gbps) to enable full 4:4:4 chroma subsampling at 4K 60Hz. This can improve text clarity and fine details, especially with gaming or UI elements.

Step 8

A Few Extra Finishing Touches

While you’re fine-tuning, there are a few more tips to get your Sony TV dialed in perfectly.

If your TV has an Ambient Light Sensor, consider turning it on if you watch content in both bright and dark rooms. But if you’re setting up a dedicated theater space that stays dark, you’ll get more consistent performance by turning the sensor off.

For Power Saving modes, it’s usually best to disable them if you want full HDR brightness without any automatic dimming.

If you use built-in apps like Netflix or Prime Video, enable Netflix Adaptive Calibrated Mode or Prime Video Calibrated Mode if available. These picture modes are designed to present content closer to the creator’s intent, with better color and contrast.

Some models even support IMAX Enhanced Mode, which is worth turning on whenever it’s an option for the most cinematic image possible.

If your TV supports Bravia Core, be sure to activate your included credits and choose the highest available Pure Stream bitrate when watching content. It’s also a great way to demo IMAX Enhanced movies in their intended quality.

For a cleaner experience, go into Inputs > External Inputs > Input Labels and name your devices (Apple TV, Xbox, Blu-ray, etc.). This helps with faster switching and better voice control if using Google Assistant.

You can also adjust subtitle size and appearance in Accessibility Settings for a better theater-style viewing experience.

And if you want to clean up your interface, head into Settings > Home Screen to hide submenus you don’t use. It doesn’t affect picture quality, but it can make navigating your TV faster and less cluttered.

Bonus

Advanced Picture Settings for Power Users

If you want to take your Sony TV’s picture quality even further, especially if you have a fully light-controlled theater room or you're planning to do a professional calibration, there are a few extra settings worth exploring.

Black Level should normally be set to Auto, but if you notice black crush or elevated blacks, you can manually match it to Limited or Full depending on your source device’s output settings.

Gamma Correction, if available, should be set to BT.1886 for the most cinematic tone mapping in dim rooms. In brighter spaces, a 2.2 or 2.4 gamma setting may be more comfortable.

Sony’s Smooth Gradation feature can reduce visible banding on low-bitrate streaming content. Setting it to Low can help clean up gradients like skies and sunsets without making the picture too soft.

And finally, keep Sharpness at 0 or around 10-20 at the maximum. Higher sharpness can introduce artificial edges and actually reduce fine detail instead of enhancing it, so for most people, we recommend just keeping it at 0.

These extra tweaks won’t radically transform your experience on their own, but for those chasing that final five percent of picture quality, they can make a good setup truly exceptional.

Final Thoughts

With a little bit of attention to detail, your Sony TV can deliver an absolutely stunning home theater experience. From vibrant 4K HDR visuals to immersive Dolby Atmos sound, it’s capable of reproducing movies and shows exactly the way the creators intended, you just have to unlock its full potential.

But wait! You may have everything configured for your Sony TV. However, there are actually more settings you should consider changing to really get the most from your setup. Even if you aren’t a tech nerd like most of us here at Audio Advice, we have videos and articles that walk you through the top video calibration tips and top audio calibration tips for your gear. We go over everything from how to get your projector perfectly in focus with free test patterns to where to place your center channel speaker for the best performance.


We’re Here to Help!

If you have further questions, contact our experts via chat, phone, or email. Or simply visit one of our world-class showrooms to experience speakers, projectors, TVs, and everything in between for yourself before you make a purchase!

If you’re planning your home theater or media room, check out our Home Theater Design page, where we have everything Home Theater related, including our FREE Home Theater Design Tool.

When you buy from Audio Advice, you’re buying from a trusted seller since 1978. We offer Free Shipping, Lifetime Expert Support, and our Price Guarantee. We look forward to serving you!