


If you're using a soundbar, you're already a step ahead when it comes to getting better sound than what your TV can offer on its own. Built-in TV speakers, especially in today’s ultra-thin displays, just can’t deliver the volume, clarity, or bass that makes watching movies or shows feel immersive. A soundbar is one of the easiest ways to upgrade your home theater experience without jumping into a full rack of AV gear.
As simple as soundbars are to set up, there are still plenty of things you can do to get dramatically better audio out of them. Whether you've picked up an entry-level model to help with dialogue or a more advanced Dolby Atmos soundbar with a wireless sub and surround speakers, a few smart tweaks can make a big difference. And if you haven't made a decision yet, we have a huge library of soundbar content, including guides like “How to Choose the Right Soundbar” and “Our Favorite Dolby Atmos Soundbars,” which are definitely worth checking out.
In this guide, though, we’ll walk you through how to get the most out of the soundbar you already have. From ideal placement and audio settings to making the most of subwoofers and rear speakers, we’ll help you unlock its full potential. Let’s start with the basics and build from there.

Why a Soundbar Is the Right First Step
Most people don’t realize just how bad TV speakers really are until they hear the difference a soundbar makes. Even a simple 2.0-channel soundbar can make dialogue more intelligible, sound effects more dynamic, and music feel fuller. That’s because the drivers in most TVs are tiny and often fire downward or backward, which limits both clarity and volume. A soundbar brings the sound forward, often with more power and better speaker placement.
Soundbars also take the guesswork out of setup. There’s no need to wire up a receiver or run speaker cables across the room. Everything is compact, simple, and usually wireless where it matters. And many of today’s soundbars support surround formats like Dolby Atmos or DTS:X, which makes the leap from “better than TV” to “immersive and cinematic” a real possibility.
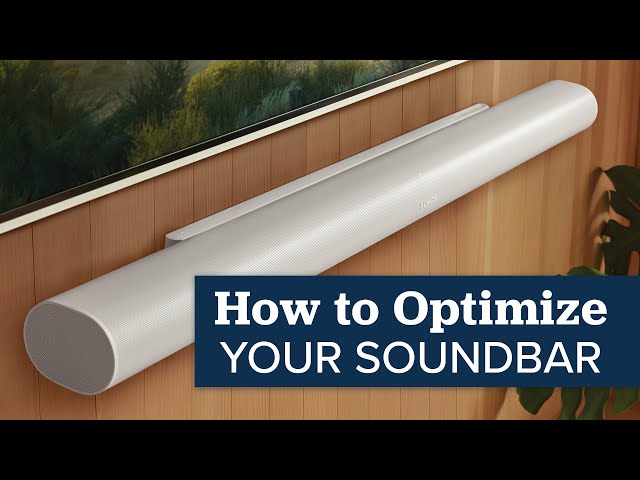
Start With Placement
One of the most overlooked aspects of soundbar performance is where you put it. Placement matters more than most people think, especially if your soundbar includes upfiring speakers for Dolby Atmos or side-firing drivers for simulated surround.
Ideally, your soundbar should be centered directly below your TV, with nothing blocking the drivers. Even if your soundbar only has front firing drivers, if you have to put it inside a cabinet, be sure to pull it as close to the front as possible. If you have a wall-mounted TV, wall-mounting the soundbar is a great look, but be sure and check the suggested distance below the screen in your manual if you have upward-firing drivers for height effects. In most cases, it will need to be about 6” below the TV. And if you have no room under your TV, it's usually fine to position it on the wall just above your TV. If it’s sitting on furniture, make sure the bar has a clear path to your ears and isn’t being blocked by the lip of a shelf or the TV itself.

Choose the Best Input and Connection
When connecting your soundbar, using the HDMI ARC or eARC port on your TV is almost always the best option. ARC (Audio Return Channel) allows your TV to send audio to your soundbar over a single HDMI cable, and eARC unlocks higher-bandwidth formats like Dolby TrueHD and uncompressed Atmos. If your soundbar supports eARC, and your TV does too, make sure to use that input. You should also check your TV settings and be sure to optimize each HDMI port to allow full bandwidth formats to work. For example, on a Sony TV, you’ll want to go to the settings and change the HDMI output to “Enhanced” instead of “Standard.”
Additionally, in most cases, we recommend setting your TV or streaming box to "bitstream" when using ARC or eARC. This allows the soundbar to decode the full surround format like Dolby Digital or Atmos directly. Some TVs will downmix these formats to PCM and reduce immersion if not set properly.
If you don’t have HDMI ARC, you could run optical out of your TV into the bar, but if your soundbar has multiple HDMI inputs, you may want to wire your streaming box and/or gaming system to the soundbar and have it feed video to your TV. Using optical will still give pretty good sound, but running direct to the bar, if you can, will give you better quality.
But the best way for most modern soundbars is to let your TV do all the switching and run a single cable from the eARC on the TV to your bar. In addition to the best audio, this also lets your TV remote control the bar’s volume and mute.

Check and Tune the Sound Modes
Once your soundbar is hooked up, don’t stop there. Most soundbars offer different sound modes that can make a noticeable difference depending on what you’re watching.
Look for dialogue or speech enhancement modes, which boost the frequencies that carry human voices. These are especially helpful if you find yourself turning the volume up just to understand conversations. We always think it’s best to test them out, especially if you’re watching content that isn’t mixed well and the voices are difficult to hear or understand. If you can understand everything fine with them off, you’ll typically get more immersive surround with dialog enhancement off, but just trust your ears as to which experience you enjoy the most.
If you’re listening at night or trying not to wake up the house, most brands also include a night mode that reduces dynamic range. It lowers the loud peaks, like explosions or gunfire, while keeping quieter sounds audible, so you don’t have to constantly ride the volume. This is a feature we often recommend checking to see if you’re looking for a soundbar that might go in a bedroom. It’s a nice touch to be able to turn this on at night without worrying about huge sounds waking everyone up.
Some models can also remember audio preferences based on the source. For example, you might want enhanced bass for your Apple TV but prefer a flatter sound for a cable box. Take time to test settings on each input if your soundbar supports this kind of memory.
Next, it’s important to take a few minutes to explore the audio settings either on the soundbar itself or through its companion app. For example, Sonos soundbars like the Beam or Arc let you adjust EQ, toggle dialogue boost, and more. Samsung and Sony models often include different surround sound modes and the ability to adjust the height or rear sound effects. Plus, many have their own automatic room calibration tools too, which we will touch on more next.
In fact, most modern soundbars today include some sort of easy to use app that walks you through every setting they have. However, once you start to get into some of the higher end models, you might start to feel overwhelmed with what the exact best settings are for you and your space. Alternatively, you may simply not want to deal with testing them all to determine what is best.
Well, this is where Audio Advice comes in. When you purchase a soundbar from us, you’ll get our team of soundbar experts to help you every step of the way. You’ll get lifetime technical support should anything go wrong, along with our team’s tips and tricks and best setting recommendations for every model we sell. We are just a call or chat away, or you can even stop into one of our many showrooms for more help.

Use Auto Calibration or Test Tones
If your soundbar has any kind of calibration feature, use it. These systems analyze your room and adjust speaker levels, phase, and EQ to improve sound quality. Most models nowadays will simply use the microphone on your phone, or come with a small mic to pair it up with, and it's one of the best ways to get better sound with minimal effort. Just be sure to follow the instructions, have the room set up exactly how you want it, and keep it as quiet as possible when running the analysis.
Keep in mind that while room correction technology can be incredibly helpful, it’s not a perfect fix for a room with poor acoustics. Paying attention to your room's acoustics is one of the most important first steps toward better sound. We have a full video that walks you through the basics, including simple DIY improvements and more advanced professional options. Even spending just a few dollars or rearranging your space can make a big difference in how your system sounds.
If your soundbar doesn’t include automated room tuning, you can still manually improve things. Some offer pink noise or test tone modes to help level-match the channels. Even adjusting the center channel level up a notch or two can help dialogue sound clearer.
In addition, if you notice that dialogue is slightly out of sync with what's on screen, most soundbars include a lip sync or audio delay setting. This can usually be adjusted in milliseconds until the video and audio line up perfectly. You can also check your TV’s settings, as some have a similar option that may need to be adjusted instead. For further help with this, we have an in-depth video that can help you get this set perfectly.
Subwoofer Setup Tips
If your soundbar came with a wireless subwoofer, there are some key things you can do to make sure it’s performing its best.
Start by placing the sub on the same wall as your TV if possible. As you move it closer to a corner, you will usually hear more bass. Most wireless subwoofers from brands like JBL, Samsung, Sonos, and Klipsch use their own wireless connection and don’t require any cables beyond power. Try moving the subwoofer around the room and listening from your main seating position. Sometimes, even just shifting it a few feet to the left or right can dramatically change how balanced the bass feels.
If your soundbar or app lets you adjust the sub level, crossover points, or phase settings, don’t be afraid to dial it in by ear with some content you’re familiar with. You want deep, clean bass that fills the room without overpowering dialogue or midrange sounds. If you haven’t set up a subwoofer before and want to really get it perfect, we have full guides and videos on subwoofer placement and calibration that will help you get the best subwoofer performance in your room.
Add Rear Speakers If You Can
Adding wireless rear speakers can take a good soundbar system and turn it into a full home theater experience. While virtual surround can be convincing, there’s no substitute for having sound physically come from behind you.
Systems like the Sonos Arc can pair with a set of Era 100s or Era 300s to become a true 5.1 or even 7.1.4 Atmos setup, depending on your room and model. JBL’s Bar series also supports wireless surrounds, and so do many of the Sony and Samsung soundbars. This is worth considering if you plan to add to your system in the future, as some models do not support surrounds at all.
When placing your surrounds, try to position them just behind and to the sides of your seating area, at about ear level when seated. Most apps will let you adjust the surround volume to taste. If your setup allows it, you can even create a more immersive zone by using upward-firing rears or matching height-enabled speakers with your front soundbar. The goal is to make sound move more convincingly around the room and create a bubble around your main seating position.
If you don’t have the space for surrounds, you can also try enabling the “virtual surround” or “3D sound” mode if your soundbar has that feature. These use clever processing to create the illusion of sound behind or above you, and while they won’t match real speakers, they can be surprisingly effective in smaller rooms.
Final Thoughts
A soundbar is one of the smartest and simplest ways to transform your TV audio. But with a few extra steps like smart placement, better connections, calibration, and even adding a sub or surrounds can make it perform far beyond what you’d expect from a slim bar sitting under your screen.
No matter how advanced a soundbar is, it still has physical limitations compared to a full home theater system with separate components. But when set up correctly and paired with the right content, today’s premium soundbars can deliver incredible performance and realism, especially in smaller rooms or setups where simplicity matters.
And if you ever want help figuring out which soundbar is right for your space or how to get the most out of the one you have, Audio Advice is always here to help. We also have tons of setup guides and walkthroughs on our YouTube channel to help you build the best home theater experience possible, no matter where you’re starting from.
We’re Here to Help!
If you have further questions, contact our experts via chat, phone, or email. Or simply visit one of our world-class showrooms to experience speakers, projectors, TVs, and everything in between for yourself before you make a purchase!
If you’re planning your home theater or media room, check out our Home Theater Design page, where we have everything Home Theater related, including our FREE Home Theater Design Tool.
When you buy from Audio Advice, you’re buying from a trusted seller since 1978. We offer Free Shipping, Lifetime Expert Support, and our Price Guarantee. We look forward to serving you!