How to Get the Best Audio and Video from Your Apple TV 4K in a Home Theater or Media Room

If you're using an Apple TV 4K in a home theater or media room, you're already off to a great start. Apple’s latest streaming box is one of the most powerful and flexible options out there. But just like any high-performance piece of gear, getting the most out of it comes down to proper setup. Whether you’re watching on a projector or a TV, and whether you’re using a soundbar or an AV receiver, we’re going to walk through everything you need to know to dial in your Apple TV 4K for the best possible video and audio performance.
Let’s start with the basics. If you haven’t already, go to Settings > System > Software Updates and ensure that your Apple TV is running the latest version of tvOS and that automatic updates are turned on. Apple rolls out new features and fixes pretty regularly, and staying current helps avoid bugs and gives you the best experience.
Now, head to Settings > Video and Audio > Format and set this to 4K SDR at 60Hz. Even if you have a Dolby Vision TV, using SDR as the default prevents your menus, streaming apps, and other non-HDR content from being force-converted into HDR.
When you try to force SDR content into an HDR format, it often results in washed-out colors, raised black levels, or unnatural brightness, especially during dark scenes or with older content. Keeping your Apple TV in SDR for the interface and non-HDR content ensures cleaner, more accurate visuals.
Then, below that, go into Match Content and turn on both Match Dynamic Range and Match Frame Rate. This is where the real magic happens. With these on, your Apple TV will automatically switch into the correct HDR format and frame rate only when it’s needed, like jumping into Dolby Vision for a supported movie, or switching to 24Hz for a cinematic frame rate.
This dynamic switching preserves the filmmaker’s intent, improves motion clarity, and ensures that HDR is only triggered when actual HDR content is playing, not just for the menus. It also prevents the Apple TV from trying to upscale or reinterpret SDR video, giving you a more faithful and immersive viewing experience.
Next, under Settings > Video and Audio > Chroma, we recommend setting your Apple TV to 4:4:4 if your system supports it. This setting maintains full color fidelity, which helps with clarity in menus, subtitles, and fine detail. However, if you run into signal instability, flickering, or black screens, especially with projectors or long HDMI cables, switching to 4:2:0 can improve reliability with very little visible quality loss.
It’s worth noting that nearly all streaming content, including shows and movies on Netflix, Apple TV+, Disney+, and others, is delivered in 4:2:0 chroma subsampling. So while 4:4:4 offers higher precision, especially in menus, computer-based media, or for things like subtitles and fine detail, you won’t actually gain any additional color detail from the source content itself. In most cases, 4:2:0 will look identical during playback and is the more reliable choice if you’re experiencing HDMI stability issues. And while we’re here, you can keep the HDMI Output setting as YCbCr, which will look the best for most TVs and projectors.
Next, to make sure your Apple TV is sending the highest quality signal possible, you’ll want to double-check the HDMI settings on your TV or projector. Most modern TVs have a setting that enables full-bandwidth HDMI for 4K HDR content, but it’s often turned off by default. Depending on your TV brand, the name for this setting will vary. On LG, it’s HDMI Ultra HD Deep Color. On Sony, look for Enhanced Format under External Inputs. On Samsung, it’s called Input Signal Plus. Whatever the label, the purpose is the same: to unlock full 4K HDR signal paths, including Dolby Vision and high bit-rate Dolby Atmos when supported. Be sure to enable this on the specific HDMI input where your Apple TV is plugged in.
If you have a TV or projector with HDMI 2.1, you may also see a feature called Quick Media Switching or QMS. This reduces or eliminates the black screen flash that happens when switching between frame rates, like going from a 60Hz menu to a 24Hz movie. There’s no setting to toggle QMS on the Apple TV itself as it works automatically in the background, but only if your display supports it too.
And one last unique Apple feature worth exploring for your video quality is Color Balance. If you have a Face ID-enabled iPhone, you can hold it up to your TV screen while Apple TV runs a quick test pattern. It doesn’t change your TV’s settings; it simply adjusts the Apple TV’s video output to improve color accuracy. This can be a helpful trick if you haven’t professionally calibrated your display, though results can vary depending on your TV. We don’t recommend using Color Balance with a projector, as the reflected image typically won’t produce accurate readings for the iPhone’s sensor. Even on TVs, we've seen mixed results, so it’s worth trying, but not always a guaranteed improvement.
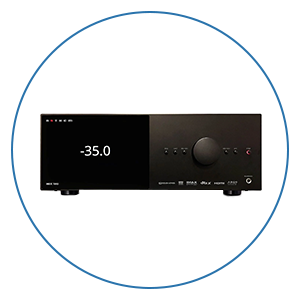
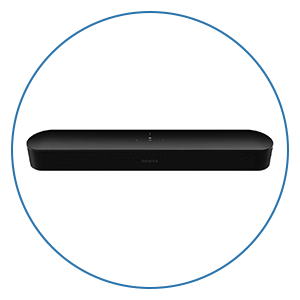
Alright, that’s all you need to do for the video settings on your Apple TV. Now let’s move on to audio. The Apple TV 4K supports Dolby Atmos, but you’ll only get full Atmos if you’re using either an AV receiver or a soundbar that supports it. The ideal setup is to run the Apple TV’s HDMI directly into your AVR or soundbar, and then pass video to the TV from there. This keeps the full Atmos signal intact. If you’re using a soundbar connected via eARC on your TV, you can still get Atmos, but you need to make sure both the TV and the soundbar support eARC and have it turned on. Regular ARC isn’t enough for the full Dolby MAT format that Apple TV uses for Atmos. If your setup is ARC-only, you might get a compressed version of Atmos at best, or fall back to Dolby Digital Plus.
Once everything is wired up correctly, go into Settings > Video and Audio > Audio Format and make sure it's set to Auto. If your receiver or soundbar supports Atmos, you’ll see Dolby Atmos enabled right there. If not, double-check your HDMI connections and try again.
There’s also a setting called Reduce Loud Sounds. You’ll find this under the same Audio section. Unless you're watching late at night and want to minimize big volume jumps, keep this off. It compresses the dynamic range, which flattens the experience for movies and makes action scenes and dialogue sound less impactful.
And here’s a bonus trick: if your audio and video ever feel out of sync, Apple has a built-in tool to fix that. It’s called Wireless Audio Sync. You’ll find it under Settings > Video and Audio > Calibration. It uses your iPhone’s microphone to detect audio lag and correct it. This is especially useful in soundbar setups or when using ARC/eARC where timing issues are common.
Next, a quick note about HDMI cables. If you’re running long distances to a projector or using full-bandwidth 4K with Dolby Vision and Atmos, make sure your HDMI cables are rated for Ultra High Speed. Cheap cables can introduce glitches, blackouts, or sync issues.
Now, one more bit of advice, if you’re finding it hard to see apps clearly on the Apple TV home screen — especially in bright rooms or on projectors — there’s a useful accessibility setting that can help. Go to Settings > Accessibility > Display and turn on Reduce Transparency. This increases overall contrast and makes menus and app tiles easier to distinguish, especially against busy or bright backgrounds. It’s a subtle change, but one that can improve day-to-day usability.
Alright, you’re done! The Apple TV is a fantastic source for high-quality streaming, but as with anything in a home theater, it’s only as good as your setup. With these tweaks, you’ll be getting the most out of every movie, show, and concert you play.
But wait! You may have everything configured for your Apple TV and some settings on your TV or projector after following this guide. However, there are actually more settings you should consider changing to really get the most from your setup. Even if you aren’t a tech nerd like most of us here at Audio Advice, we have videos and articles that walk you through the top video calibration tips and top audio calibration tips for your gear. We go over everything from how to get your projector perfectly in focus with free test patterns to where to place your center channel speaker for the best performance.
We’re Here to Help!
If you have further questions, contact our experts via chat, phone, or email. Or simply visit one of our world-class showrooms to experience speakers, projectors, TVs, and everything in between for yourself before you make a purchase!
If you’re planning your home theater or media room, check out our Home Theater Design page, where we have everything Home Theater related, including our FREE Home Theater Design Tool.
When you buy from Audio Advice, you’re buying from a trusted seller since 1978. We offer Free Shipping, Lifetime Expert Support, and our Price Guarantee. We look forward to serving you!


