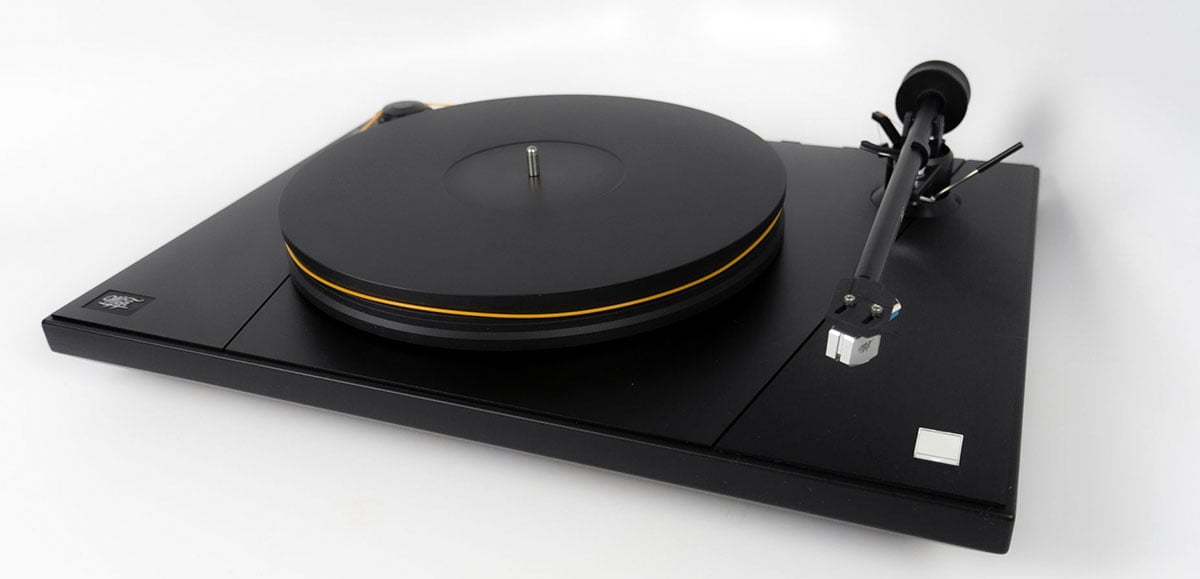
MoFi UltraDeck Turntable Setup Guide
Setting you your MoFi UltraDeck turntable can be fun and go smoothly if you prepare for everything you’ll need in advance. We hope this guide enables you to spin some vinyl and enjoy music faster than you expected.
Preparing Where You Will Place Your MoFi UltraDeck
If you have large speakers, it's a good idea to keep your new turntable away from them. Having your turntable too close to speakers can cause acoustic feedback which is a howling sound you’ll only need to hear once to know you’ve done something wrong! Help your turntable get off to a good start by putting it on a solid, level surface.
You will want your turntable to be pretty close to your amplifier or phono preamp. It is important to remember the cables coming out of your turntable are carrying a very low-level signal. They are short on purpose for this reason. You also do not want to have an AC power cord running parallel to them.
Unboxing your MoFi UltraDeck Turntable
We suggest you unbox your turntable either on the floor or on a table near its final position. Save all of the packing (it will come in very handy when you move) and lay everything out so it's easy to get to.
Go ahead and put your turntable in the spot you picked out for it.
Make the audio connections
We feel it's best to connect everything up before you do the final assembly as it's easier to turn things around while the turntable is not fully assembled and everything should still be protected at this point.
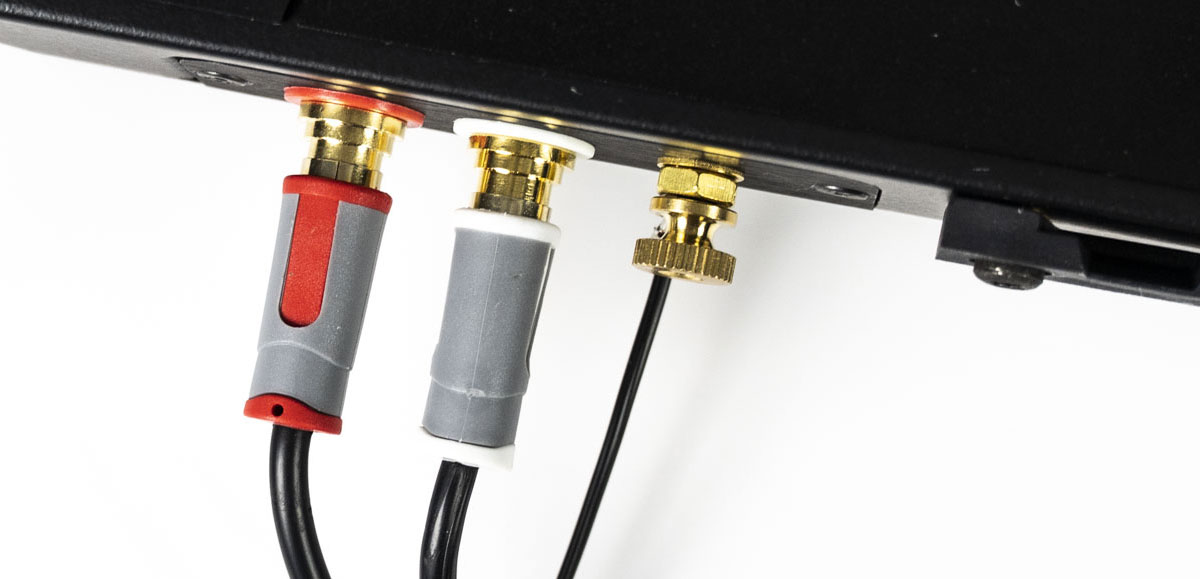
Your MoFi turntable comes with a pair of audio cables. First, connect the ground wire to the back of your turntable by turning the little knob enough to insert it under the knob, then tighten it back. Then connect the left and right color-coded cables to the jacks on the back of your turntable. Make sure they go on all the way. Connect the other end to your phono preamp or amp with a built-in phono preamp. Also, connect the ground wire to the ground lug on your phono preamp or amp. If you are using a separate phono preamp, make sure to connect cables from it to your amp. From a separate phono preamp, you should go into an AUX type input on your amp, NOT a phono input.
Make the power connections
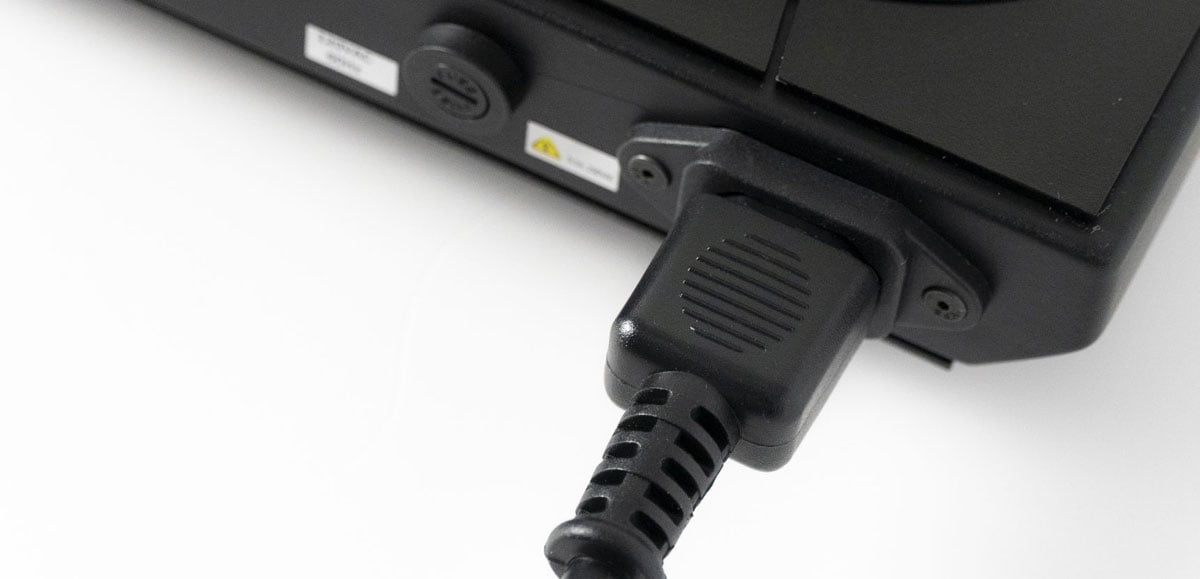
Connect the included power cord to the connection on the rear of the turntable. Make sure this power cable does not run parallel to the audio cables coming out of your turntable.
Start Assembling Your MoFi UltraDeck Turntable
Remove the protective tape from the platter and turntable bearing. Carefully center the platter on the bearing and lower it down. The bearing on the UltraDeck is made to extremely tight tolerances. It may take a minute or two for the platter to settle all the way down. Once it does, give it a spin to make sure it spins freely.
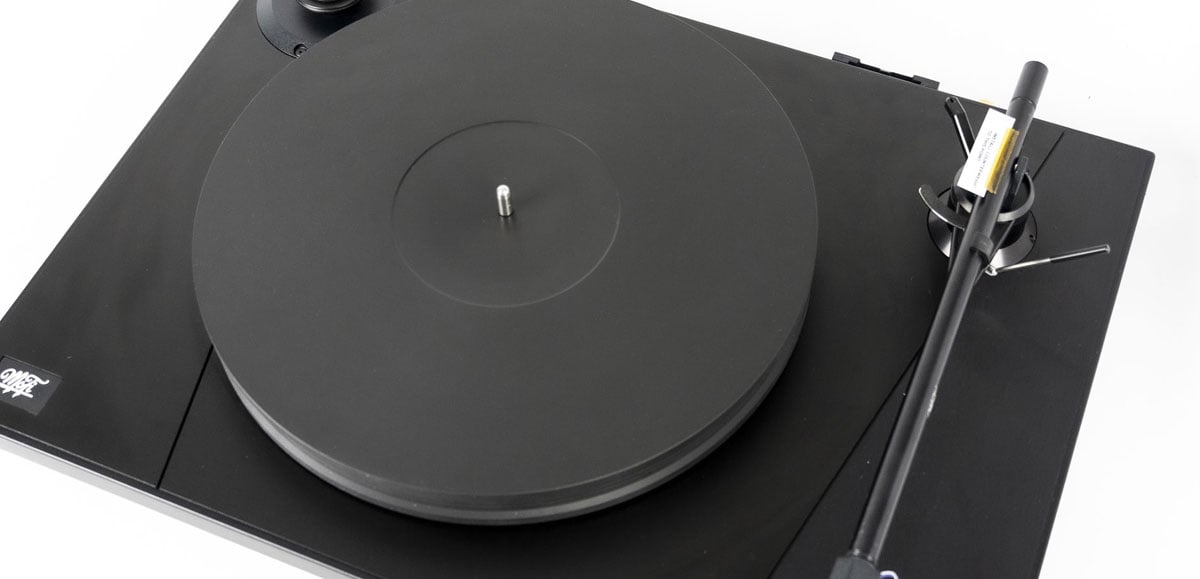
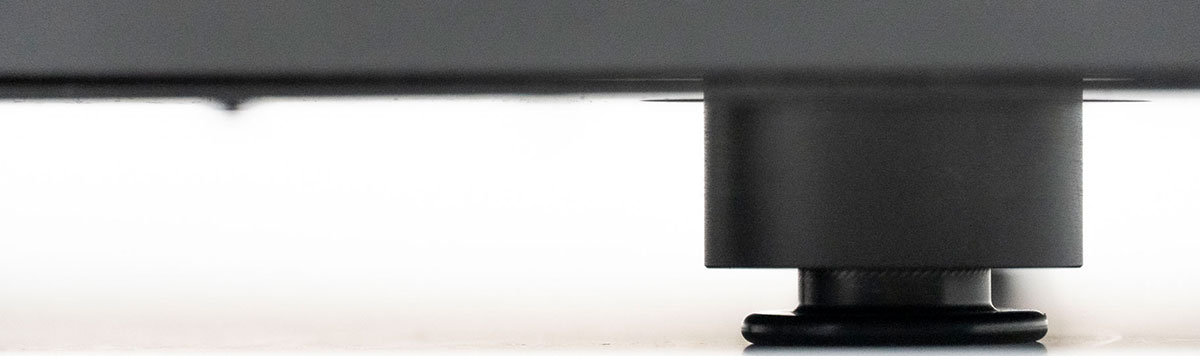
Now is a good time to check for level. Your UltraDeck has adjustable feet you can turn to level things up. The outside part of the foot spins to allow you to level it.
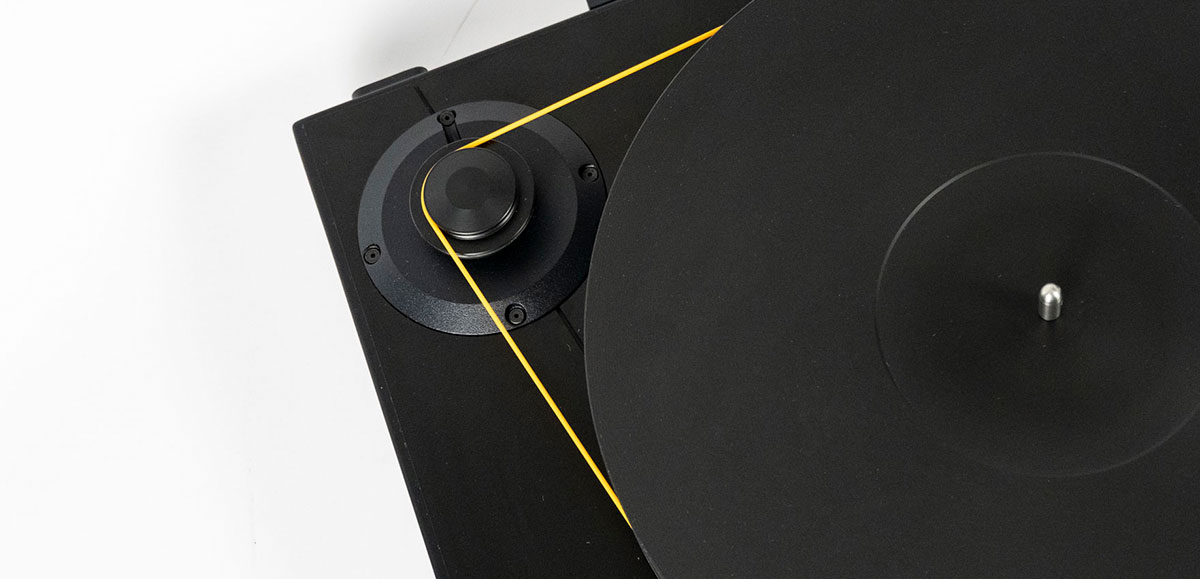
Make sure your hands are clean for this step. Find the belt and wrap it around the outside of the platter and on the top groove of the motor pulley. The top is for 33 and the bottom is for 45.
Balance the Arm and Set Anti-Skate
We find it easier to install the anti-skate mechanism first as the counterweight will not be in the way. If your table came with a MoFi cartridge installed, remove the little piece of paper with an arrow on it.
Find the anti-skate assembly. This is a small round silver metal cylinder with a tiny piece of monofilament with a loop on one end. There is a small black o-ring at the end of the loop. On the back of the tonearm, you will see a tiny silver, round post with notches in it. For the MoFi StudioTracker cartridge, you want to put the o-ring on the second notch counting out from the tonearm. For the MasterTracker and UltraTracker, it goes on the third notch. If you do not have a MoFi cartridge, check its weight (not tracking force). Notch 1 is for 4-6 gram weights, Notch 2 is for 6-8 gram weights, Notch 3 is for 8-10 gram weights, Notch 4 is for 10-12 gram weights. Finally, take the cylinder and thread the remaining monofilament through the hanger arm coming off the tonearm. It can be a little tedious to get the o-ring over the round post, just take your time.
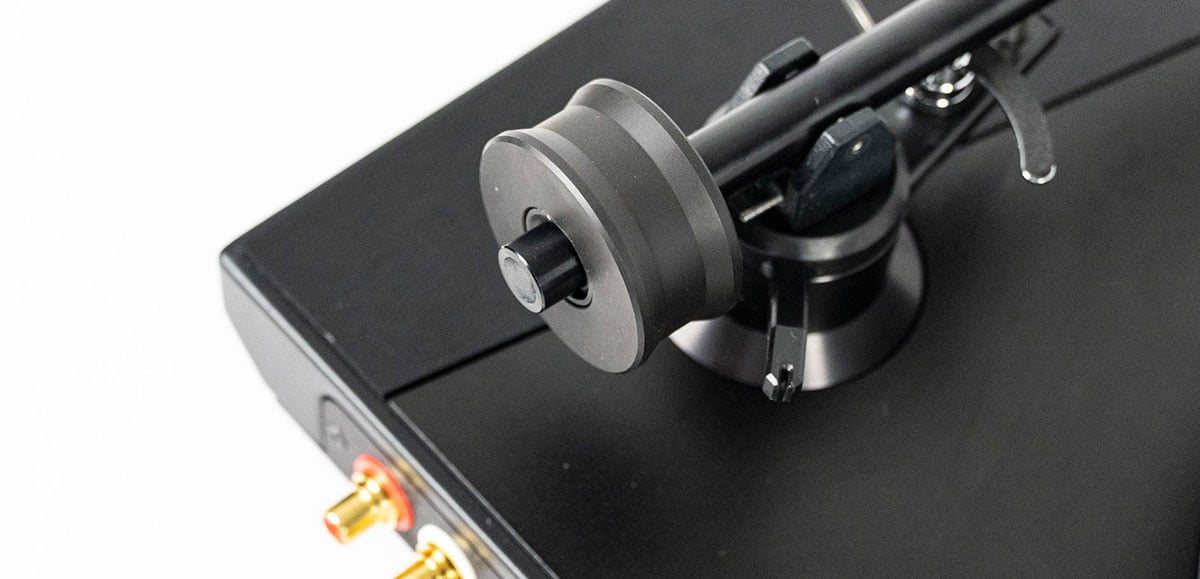
Locate the round counterweight and screw it on to the rear of the tonearm. If you purchased the Studiodeck with a premounted MoFi cartridge there will be a little sticker pointing to a piece of tape. You want to screw the counterweight towards the front of the tonearm until it just touches the piece of tape. You can leave the small piece of tape that indicates the proper tracking force position.
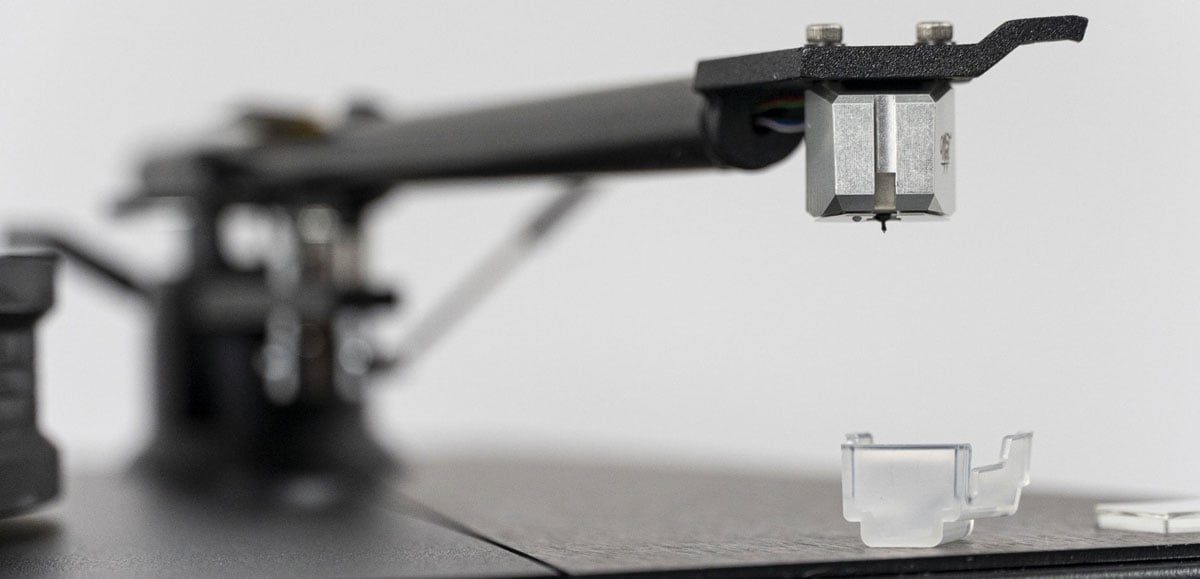
Carefully remove the piece of tape off the stylus guard and remove it from the cartridge, it pulls straight down. Keep your stylus guard in a safe place, it will come in handy if you need to move your table. It is also a good idea to put it back on if you have a cleaning service.
Your UltraDeck has an adjustable VTA and azimuth. If your table came with a MoFi cartridge or if Audio Advice installed your cartridge, these have already been set. If not, VTA (adjusts the height of the arm) is a set screw on the base of the arm. Azimuth is a small screw on the bottom side of the headshell. The goal is to have the headshell parallel to the record surface.
Enjoy Some Music!
Put on your favorite album, then turn on your MoFi UltraDeck using the power button on the top.
Make sure the cueing arm is in the up position, move the tonearm over the beginning of your record, lower the cue and enjoy the music!
When the record ends, you will need to lift up the cueing lever, return the arm to its rest, and switch off the motor. Or better yet, play another record!
Should you ever need to transport your turntable more than across the room, its a good idea to remove the platter and lock the tonearm down with a twisty tie. You might also consider placing the stylus guard back on.
We hope you enjoy your new turntable for many years to come. If you have any other set up questions (or any questions at all), hop into our online chat, email us, or give us a call. We are here to help!
If you are in research mode and want to learn more about the MoFi UltraDeck Turntable, we have a complete comparison of the UltraDeck compared to the StudioDeck on our blog.