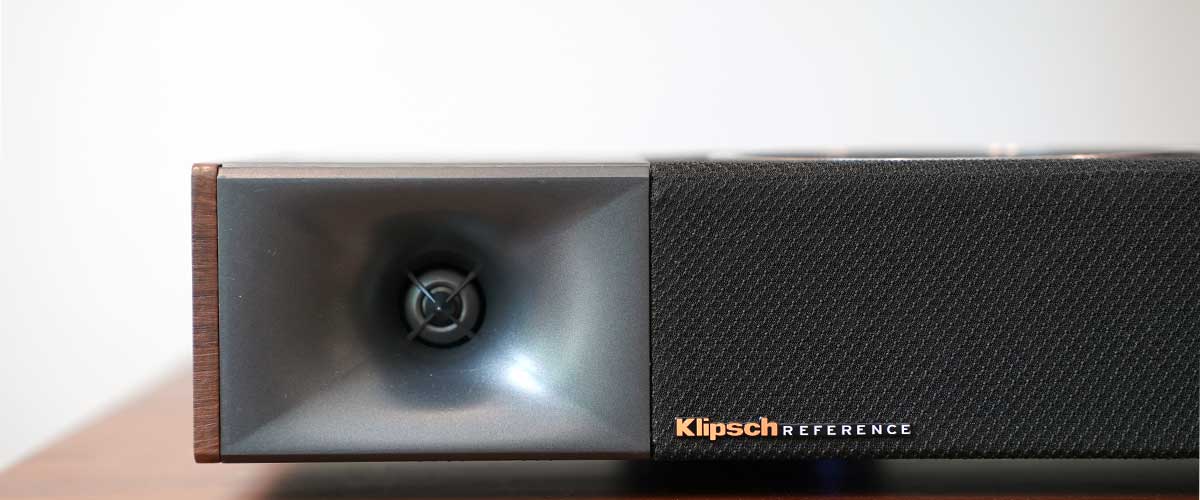
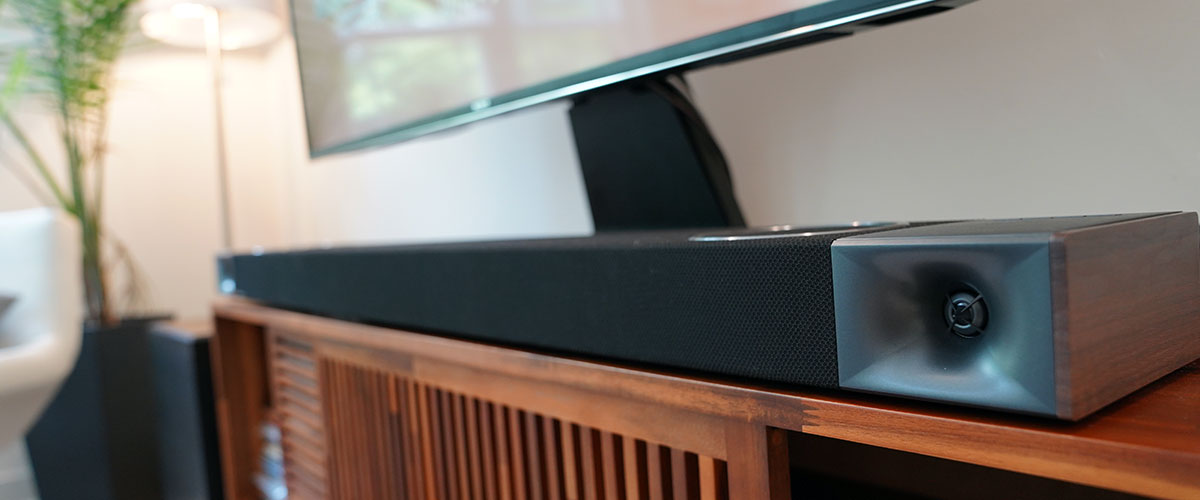
Klipsch Cinema 1200 Dolby Atmos Sound Bar Tips & Tricks
The Klipsch Cinema 1200 Dolby Atmos Sound bar offers a ton of high-performance features and cool tech. In this Tips & tricks guide, we will cover everything you need to know from understanding what all the buttons and modes mean to the best Atmos speaker placement options so that you get the most optimized 3D soundstage in any room. Let’s get started!
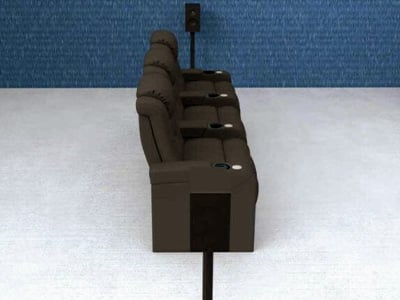
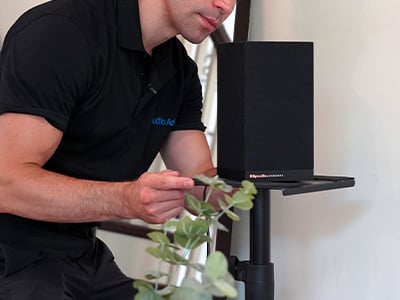
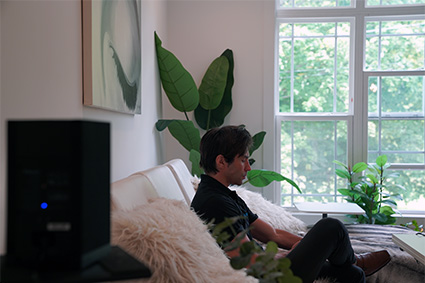
Positioning the Surround/Atmos Speakers
You will get the most immersive experience if you can put them on either side of your couch with the bottom of the speaker right at your ear level. Make sure to point the front of the speaker towards your ears, rather than towards the TV.
It is more important to point them towards your ears than get the exact height if you have to put them on end tables, but ideally, they should be just above ear level.

Adjusting the Levels
The Klipsch Cinema 1200 has adjustments for each surround speaker, the front height speakers, the rear height speakers (which are built into the surrounds), and the subwoofer. To get a balanced immersive experience will require a little experimentation.
If the surround speakers are within 4 feet or less of your main listening position, you should have their level set around zero. In some rooms, one speaker may be further away than the other and in that case, you should experiment with increasing the volume of the one further away.
Getting the height channels adjusted will depend on your room and how far you are seated from the bar. In most rooms, you will be much closer to the surround speakers than the bar. We find if this is your case, with a flat ceiling, set the FHT channels to somewhere between 4-6 and the BHT to between 0-2. On a great Atmos soundtrack, you want it to sound like the height effects go all the way between your ears and the TV.
If you are sitting closer and the surround speakers containing the rear height channels are about the same distance from you as you are from the main bar, try setting both the FHT and BHT levels between 0-2.
For those of you with vaulted ceilings, you will need to experiment more with the levels to get things balanced, but these will be good starting points.

Subwoofer Placement & Levels
Subwoofers will produce the most bass output when they are in a corner, but putting a subwoofer completely shoved into a corner can cause your bass to be boomy in some rooms. We suggest, if you can, put it about 12” away from the sidewall and a few inches off the back wall.
While it is tempting to turn the subwoofer level up to overwhelm your room with bass, and the subwoofer the Cinema 1200 comes with is certainly capable of that, you should try to balance it so you can still hear the dialog even when big explosions are happening. For most rooms, anywhere between 0-2 will be your best setting.

What the Buttons on the Remote Mean
SOURCES: Bluetooth, Analog, Digital, TV, HDMI 1, HDMI 2
*Trick: Holding down the LED button shows you what kind of content is being decoded. If you are getting Dolby Atmos, the display will show this.

Bluetooth: Press and hold the Bluetooth button to enter pairing mode.
Analog: Connect any analog audio source such as a laptop, CD player, or smartphone via the 3.5 stereo mini plug to the analog input of the soundbar. You can also use this connection if your TV does not support HDMI Arc or Digital Optical connectivity. *This connection does not support Dolby Atmos or Dolby Digital decoding.
Digital: Use this connection for audio sources with a digital optical output, such as CD players, audio servers, or streaming audio players.
TV: Use this connection when you want to use your TV as the source switch for external HDMI sources to play audio/video content with Dolby Atmos compatibility from streaming boxes, Blue-Ray Players, gaming consoles, etc. *This connection type will only support Dolby Atmos playback if your TV supports HDMI eARC.
HDMI 1/HDMI 2: Use these connections for external HDMI sources to play audio/video content from external streaming boxes, Blue-Ray Players, gaming consoles, etc.

MODES: Standard, Direct, Movies, Music, Game, Party
Standard: Use this mode for everyday listening with Atmos-enabled music, movies, and TV shows mixed to 5.1.4.
Direct: This mode is best for “Artist intent” playback of movies, TV shows, stereo (2-channel) music playback with the same output format as the source format, up to 5.1.4.
Movies: Best mode to use for enhancing the level of immersion during movies and TV shows.
Music: Best mode to use for a more immersive, listening experience that’s optimized for music.
Game: Best mode to use for a more immersive audio experience with video games.
Party: Converts all the Dolby Atmos channels into all channel stereo. Use this mode to optimize the field of sound coming out of all the speakers to be better-suited for background/party music.
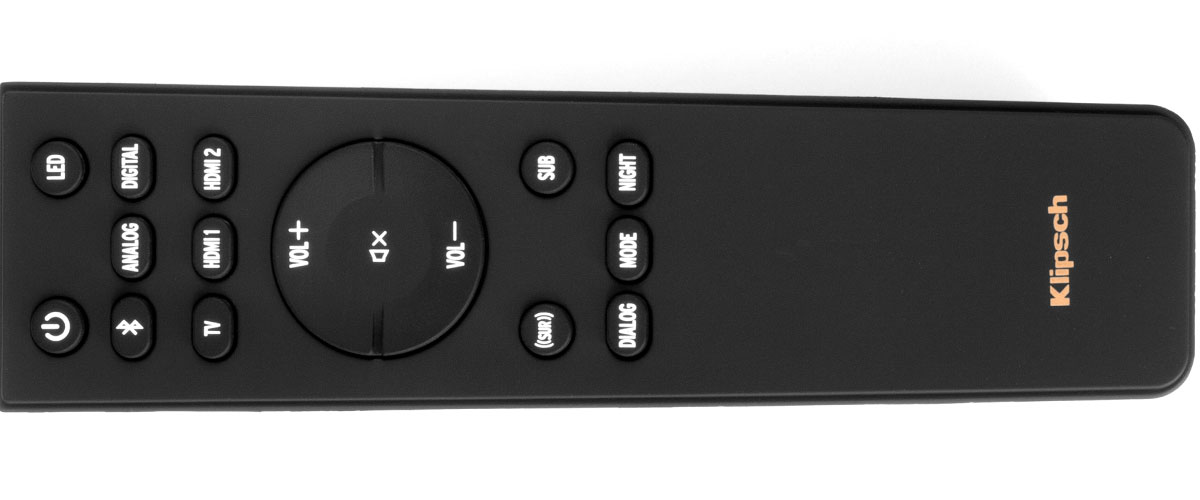
CONTROLS: DIALOG, NIGHT, SUB, ((SUR))
*Trick: How to reset levels back to their defaults:
- Holding down the ((SUR)) button resets all the surround levels to default 0.
- Holding down the SUB button resets the subwoofer level back to 0.
- Holding down the DIALOG Enhance button resets the dialog modes to OFF.
- Holding down the NIGHT mode button resets night mode to default.
Dialog: 0, 1, 2, 3
In the “0” position, Dialogue mode is OFF. As you move up through the higher numbers, dialogue in the midrange frequencies is presented more clearly in the soundstage. Dialogue 3 sounds a little too forward in the soundstage, so we only recommend this level if you have trouble understanding the dialog. *Tip: Press and hold the Dialog button to reset it back to default.
Night: 0, 1, 2
This mode will tame down the bass output that could resonate through the walls of your home and disturb people. Going all the way up to level 2 will completely remove the bass, so we recommend level 2 only for those times you really need to not disturb people in the household.
SUB
This button will let you manually adjust the level of the bass output coming from the subwoofer. *Tip: Hold down the sub button will reset the subwoofer level back to default.
((SUR)) - Surround
This button toggles through each surround sound channel so you can manually adjust the levels of each speaker from -6 to +6. Below are all the surround sound channels that can be adjusted and what each one means. *Tip: Holding down the surround button will reset all of the surround levels back to the default level 0.
- LSR (Left Surround Speaker)
- RSR (Right Surround Speaker)
- FHT (Front Height)
- BHT (Back Height)
Have Fun!
The Klipsch Cinema 1200 Dolby Atmos soundbar packs a ton of horsepower. Whether you are wanting to take full advantage of all the cool movies constantly coming out that encoded in Dolby Atmos or just wanting to throw an epic house party with some great sound, we hope these Tips & Tricks help you squeeze every last drop of performance from your Klipsch Cinema 1200. Until next time, happy listening!
Klipsch Cinema 1200 Dolby Atmos Sound Bar Review
The Klipsch Cinema Series 1200 Dolby Atmos Soundbar with wireless sub and surrounds provide the total package — delivering Klipsch’s horn-loaded performance, plus everything you’ll need for a cinematic experience in your home. However, Klipsch put a few surprises under the hood to make this one really stand out. If you are looking for serious performance that will future-proof your setup — Klipsch has a solution that will let you enjoy true 5.1.4 Dolby Atmos with 8K capabilities for an impressive price-point.