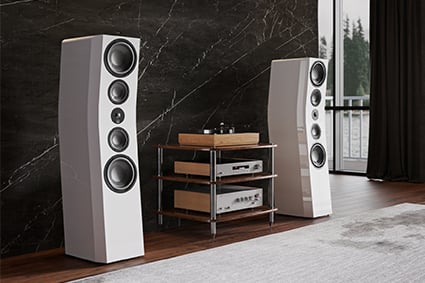
Devialet Expert Pro Integrated Amp Tips & Tricks

If you are reading this, it is likely that you are either a lucky new Devialet Expert Pro owner, or perhaps you are considering one and are wondering how the setup will go. For those of you who are new owners, congratulations!

In this tips & tricks setup guide, we will help you get up and running quickly and give you some insight into how to fine-tune your sound once you have everything working.

Configuring Your Devialet Expert Pro

The first thing to consider before setting up anything is that you will need to configure your Devialet using a web browser. You will also need to be able to load the configuration file onto the SD card you will find in the back of your unit. If your computer does not have an SD card reader, you will need to obtain one. There are several inexpensive ones on the market that convert a USB port to an SD card reader.

While this may seem like a bit of a pain, the Expert Pro is so flexible that being able to do all of the setup from a computer really speeds things up.

  • You will need to register at www.devialet.com as a user. You will then click on your account and go to Expert Configuration.
  • Next, choose New Configuration and follow the prompts.
  • You will then be presented with a visual of the rear panel. Keep clicking Next until you see the option Go to Advanced Configurator.

Setting Up Wi-Fi

We recommend you set up your Expert for wireless, as opposed to wired, if you have good wifi in the area, as we found music streaming to be slightly better if done wirelessly. 

With everything you do from here, there is a little trick to getting the options to show up.

  • Click on the connector on the rear panel view. The arrow under the name of the connector will change color to orange, which allows you to open the window for setting up that connector. 
  • Click on the wifi icon on the left-back. When the arrow turns orange click on it and enter your network credentials.
  • Click “OK” before you close the window.

Be sure to click “OK” on all of the adjustments below to save your changes.

Assigning Connections

You will observe as you go through these settings below that when you click on one, a little window pops up on the right that gives you detailed information relating to that particular setting.

Next, you will want to think about the other connections you will make for your sources. Your Devialet is very flexible here and allows the rear inputs to be either analog or digital.

 If you are using a turntable, click the phono input, then you will see a host of options for different phono cartridges. If yours is shown in the list, just select it and everything will be all set. If it is not shown, find the suggested settings from your phono cartridge model and set them in the boxes you see. You will even see the ability to change the RIAA load for very old records, we suggest you leave it at the default of RIAA 1976 as most records are that way and you can change it using the remote.

Next, assign any of the other connections to match your sources — be it a CD player with analog outputs or a CD transport with a digital out. As you go through, you will see this amp is just super flexible.

Speaker Configuration

If you do plan to use a powered subwoofer with your Devialet, you will need one or two (for a pair of subs) outputs which are labeled pre-out. Bear this in mind when arranging your inputs.

If the speaker connections are not orange, click on each channel to make it orange. Confirm the slider is in stereo. Then, when you click, you will see a lot of options. Most of these come into play if you were using 2 Expert Pro’s linked together to biamp a pair of speakers and bypass their crossovers. We suggest you leave the speakers set to full range unless you are using a subwoofer.

For subwoofer users, select High Pass, then set the frequency you want to roll off your main speakers at. In most cases, this will be 80 Hz. We suggest you set the filter order to 4 which is 24 db per octave that will integrate the two subwoofers the best. Also select PreOut On.

If your subwoofer has any type of room correction built-in, and many do these days, that circuitry will add a delay to the sound. For example, Paradigm and MartinLogan subs that use ARC have a 12 milliseconds delay. JL Audio subs have a 20 milliseconds delay. This means you will need to delay your main speakers so the sound arrives at your ears at the same time as the subwoofer. 

If your subwoofer is not on the same left to right plane as your mains, and this applies to all subwoofers, you will want to add 1 millisecond of delay for each foot it is behind your main speakers. Now, the catch is, just below the filter you see a delay line. Devialet displays the delay in microseconds which is 1/1000 of a millisecond. Take the number of milliseconds and add 3 zeros to get to the number. The Expert Pro gives you a maximum of 20 milliseconds or 20,000 microseconds.

Now, go to the pre-out connections. 

If you are using a single subwoofer select: mono, low pass, set the frequency to the same number you used above, and set the filter order to 4.

We prefer mono for two subs as well, but if you want to experiment you could select each channel as left and right. Do not add any delay for the subwoofer outs. Make sure PreOut is set to Variable.

For more tips, check out our video on how to set up and calibrate a subwoofer.

Now click on the box with the arrow next to the left of the SAM logo. This will bring up a list of over 900 speakers. Hopefully, your speakers are on this list or a very similar model is. Choose the correct one.

In the box to the left of your speaker is a place to give your Devialet Expert Pro a name — just type that in.

General Settings

Now, click on General Settings all the way to the left. Here you can adjust the turn-on volume, power-saving settings, display brightness, and what is super cool — the frequency that the tone controls cover.

Remote Settings

Next, click on Remote Settings and you will be able to change what each button on the remote gives you quick access to.

If you are the type of person who likes to play around with things, you will find you can do lots of neat stuff with the remote. You will need to be able to see the top of your Devialet, but you can adjust how much of the SAM processing is applied, change Phono RIAA, adjust the tone controls, and more, all from the remote using the front panel as the visual display.

Finishing Up

  • Click the download button and you will jump to a new screen. The text on the screen will say “right click to save target as” but on most computers, the right click option you want is “save image as”. It should save it as a .txt file
  • Using the file explorer of your computer, drag that file onto the SD card. 
  • Insert the SD card into the back of your Devialet Expert Pro, and then make all of the physical connections.

We hope this quick setup guide explains everything you need to know to create great sound with the Devialet Expert Pro. If you have any questions, you can chat with an expert at AudioAdvice.com, call us, or visit one of our world-class showrooms.

MORE VIDEOS & REVIEWS

Wishlist
Copyright © 2024 Audio Advice. All rights reserved.